Theme Favicon Client Extension in Liferay 7.4

Theme Favicon Client Extension in Liferay 7.4

Introduction

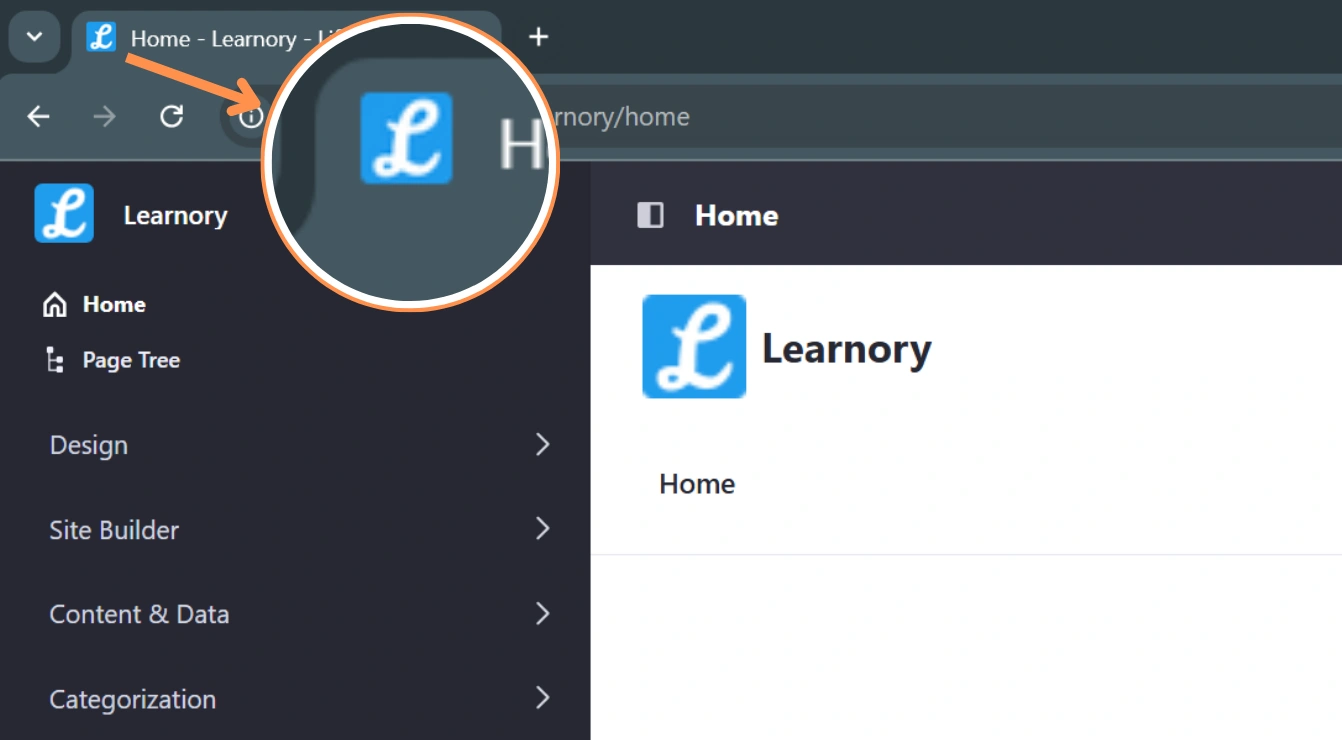
Liferay 7.4 introduces the client extensions framework - a modern, decoupled approach to Liferay application customizations. One of the most common way is adding a favicon to your Liferay theme. This allows you to override the theme’s favicon on the selected page. To do this with a Theme Favicon Client Extension, read the following blog post.

Prerequisites

Liferay 7.4+

Creating Theme Favicon Client Extension

You can create the client extension in two ways:

  1. Using Liferay’s client extension admin panel
  2. Using Blade CLI

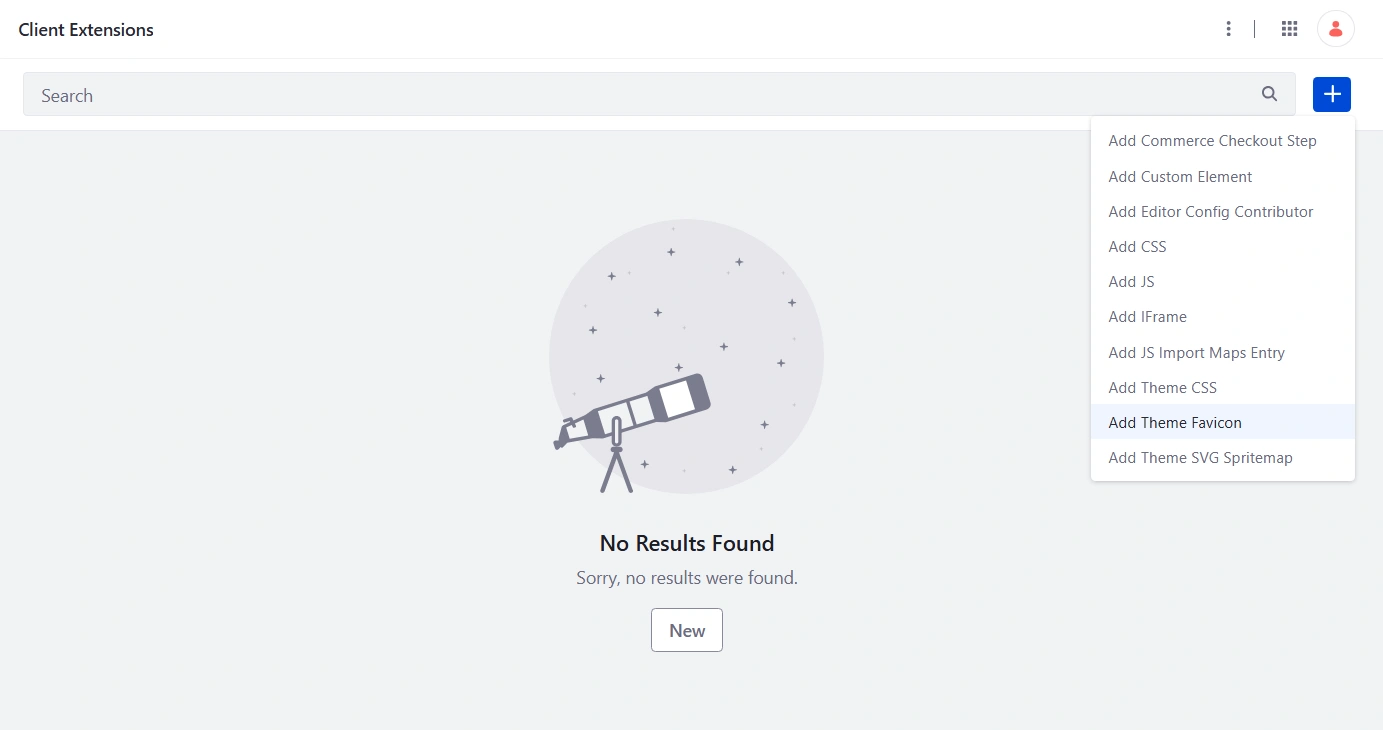
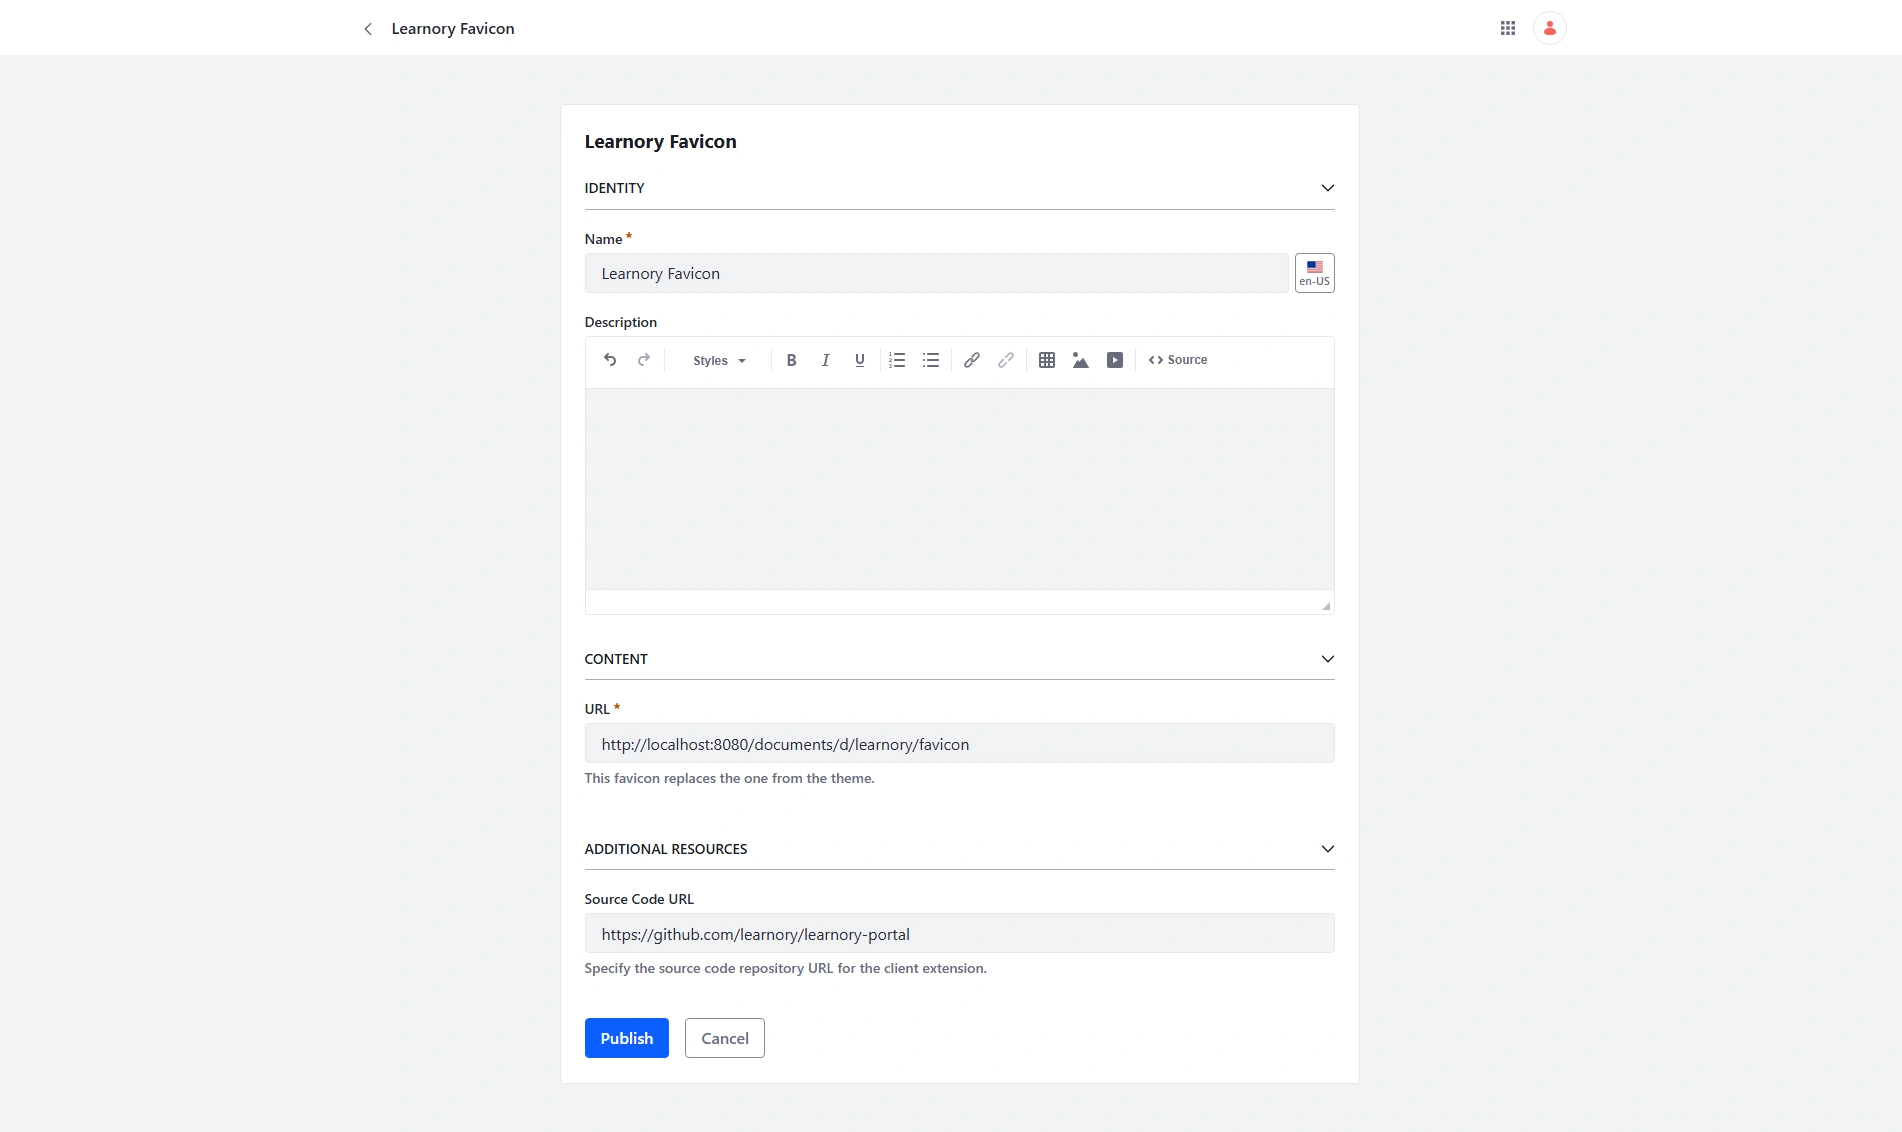
Using Liferay’s client extension admin panel:

  1. Open the Global Menu ( icon-applications-menu ), on the Applications tab, and click on Client Extensions.
  2. To create new client extension, click on the Plus ( icon-add ) and select Add Theme Favicon from the dropdown.
Adding Theme Favicon
  1. Provide the name and description of the favicon.
  2. In the URL you can set a favicon by either adding a URL link to an online favicon or uploading the favicon to Documents & Media and using the generated link.
  3. The Source Code URL refers to the location where the source files of the favicon are hosted. This is typically used for debugging, sharing, or version control purposes. It allows developers and administrators to trace the favicon's origin or review its implementation. (e.g. https://github.com/learnory/learnory-portal)
Details of Theme Favicon Client Extension

Using Blade CLI

Note:

If you’re using Liferay workspace, you must use at least version 10.1.1 of the workspace plugin, com.liferay.gradle.plugins.workspace. Set this in the settings.gradle file at the root of the workspace.

				
					classpath group: "com.liferay", name: "com.liferay.gradle.plugins.workspace", version: "10.1.1"


Creating the Client Extension

  1. Run the command blade samples client-extensions -l from the root directory of your Liferay workspace to display all available client extensions.
  2. To create theme favicon client extension, run blade samples client-extensions liferay-sample-theme-favicon command, which will create both the client-extensions folder and the sample theme favicon client extension inside it.

All configurations of all types of client extensions are placed in client-extension.yaml file. Let’s look at the content of it.

				
					learnory-theme-favicon:
     name: Learnory Theme Favicon
     type: themeFavicon
     url: favicon.*.ico
				
			
  • The client extension has the ID learnory-theme-favicon and provides the main configurations for a theme favicon client extension, such as the type and favicon file to add.
  • url specifies where the favicon icon image is located. When the client extension is deployed, this image is added as a new favicon option for each page.

It also contains the assemble YAML block:

				
					assemble:
     - from: assets
       hashify: favicon.ico
       into: static


This means that everything in the assets/ folder should be included as a static resource in the generated client extension .zip file. Liferay treats the favicon file in a theme's favicon client extension as a static resource.

Deploy the Client Extension

Run following command from the Liferay workspace:

				
					./gradlew clean deploy -p client-extensions/learnory-theme-favicon


Using the Client Extension on a Page

You can configure theme favicon on all pages or specific page from the respective configurations.

  1. On the page, click configuration ( icon-cog3 ) at the top.
  2. In the side nav menu, click Design and scroll down to Basic Settings section and click on Favicon input.
  3. Click on the Client Extensions tab and select the newly deployed favicon, Learnory Theme Favicon and click Save.
Configure Frontend Client Extension in Page
  1. Go back to the page. The new favicon appears on the browser tab.
Preview of Favicon

Conclusion

Using a Theme Favicon Client Extension in Liferay 7.4 is a simple and modern way to customize your portal’s branding. By leveraging the Client Extensions framework, you may add a favicon in a modular and maintainable way, ensuring future upgrades are trouble-free. This approach aligns with Liferay’s modular architecture, making it scalable and easy to manage. Whether you’re a developer or an administrator, this solution simplifies the process and gives your portal has a clean, professional appearance.

Let's make something awesome together

We are excited about the opportunity to learn more about your business and how
we can help you achieve your goals in the digital world.